
Table of Contents
There are various ways of deploying React applications to Microsoft Azure. It can be hosted in multiple ways. If you are designing an application which is using a server to process the data, and that backend is using ASP.NET Core, you can easily deploy a React application together with a server under one resource.
In this article, I am going to show you how to:
- Create an ASP.NET Core application that is going to host a React Application
- Build the application using Azure DevOps
- Deploy the application to Microsoft Azure using Azure DevOps
- Set up build & deploy pipelines for providing CI/CD
Creating and Adjusting Applications to Deploy React to Azure
1. Prepare Directory Structure
Let’s get started by creating proper directory structure.
We need to create the main directory which is going to hold our applications. Then, inside it, we are going to create our applications.
2. Create React App (Front-end)
Time to create applications so we can deploy React to Azure!
We are going to start by creating a new React application using the CLI tool called ‘create-react-app’. Simply put, create-react-app is going to do all of the magic required for setting up the application.
Let’s create an application called ‘react-demo’ using typescript template with a command:
npx create-react-app react-demo --template typescriptGreat. Now that our application was created, we can modify the App.tsx file and add some information. (I’ve just replaced the paragraph text with ‘Hello! This is React-Demo app which was built and deployed to Azure with Azure DevOps).
We can check if the application was created successfully by running it:
npm startAfter running it we should see something like this:
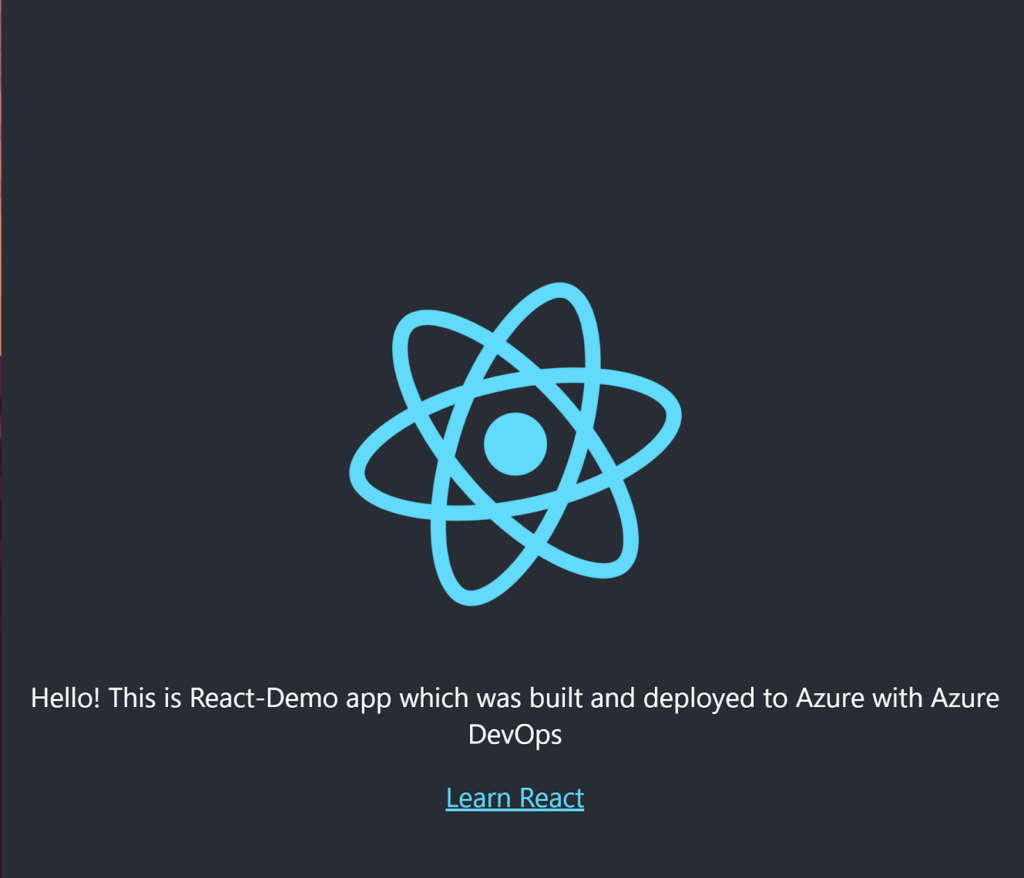
That is it for the React application part.
For the purpose of this demo, we want to keep it super simple.
3. Create ASP.NET Core application (backend)
It’s time to create a backend. We are going to do it with dotnet cli tools, but you can do the same with the .NET IDE which you are using. In our main directory, let’s run a command to create a solution first.
dotnet new sln -n react-demo-backendAfter creating the solution, it’s time to create our ASP.NET Core project.
dotnet new webapi -n react-demo-backend -f netcoreapp3.1Please note that we are targeting .NET Core 3.1. That is because, at the time of writing the article, it is the LTS version that is recommended to use on production scenarios.
After creating the project, it’s time to link it to the solution:
dotnet sln react-demo-backend.sln add react-demo-backend/react-demo-backend.csproj4. Adjusting ASP.NET Core application
Now this is when magic is going to happen. We are going to adjust our ASP.NET Core application.
First, under the Controller directory, we need to create a Fallback controller. Whenever the route is not going to be matched, all of the load is going to be forwarded to this controller.
Controllers/FallbackController.cs
using System.IO;
using System.Net.Mime;
using Microsoft.AspNetCore.Mvc;

namespace react_demo_backend.Controllers
{
   public class FallbackController : Controller
   {
       public IActionResult Index()
       {
           return PhysicalFile(Path.Combine(Directory.GetCurrentDirectory(),
               "wwwroot", "index.html"), MediaTypeNames.Text.Html);
       }
   }
}
The wwwroot/index.html is going to be our entrypoint for the React application. So whenever a route has not been matched, it is going to forward the request to wwwroot/index.html. That’s where React will take care of itself, and should display built applications.
As we created our FallbackController, it’s time to tell the framework that it should use it. This is going to be done in Startup.cs.
Startup.cs
using Microsoft.AspNetCore.Builder;
using Microsoft.AspNetCore.Hosting;
using Microsoft.Extensions.Configuration;
using Microsoft.Extensions.DependencyInjection;
using Microsoft.Extensions.Hosting;

namespace react_demo_backend
{
   public class Startup
   {
       public Startup(IConfiguration configuration)
       {
           Configuration = configuration;
       }

       public IConfiguration Configuration { get; }

       public void ConfigureServices(IServiceCollection services)
       {
           services.AddCors(options =>
           {
               options.AddDefaultPolicy(policy =>
               {
                   policy.AllowAnyHeader().AllowAnyMethod().AllowAnyOrigin().Build();
               });
           });
           services.AddControllers();
       }

       public void Configure(IApplicationBuilder app, IWebHostEnvironment env)
       {
           if (env.IsDevelopment())
           {
               app.UseDeveloperExceptionPage();
           }

           app.UseCors();
           app.UseRouting();
           app.UseDefaultFiles();
           app.UseStaticFiles();

           app.UseEndpoints(endpoints =>
           {
               endpoints.MapControllers();
               endpoints.MapFallbackToController("Index", "Fallback");
           });
       }
   }
}
This Startup code makes the framework:
- Define and use the default CORS policy to allow everyone and anything
- Add support for static files
- Indicate a fallback controller action according to what we have prepared previously
Important: Make sure to push the main directory to the Azure DevOps repository so we can use it in the next stages
Creating Azure Resource
We are going to use Azure Portal to create the resources. This is how we will deploy React to Azure.
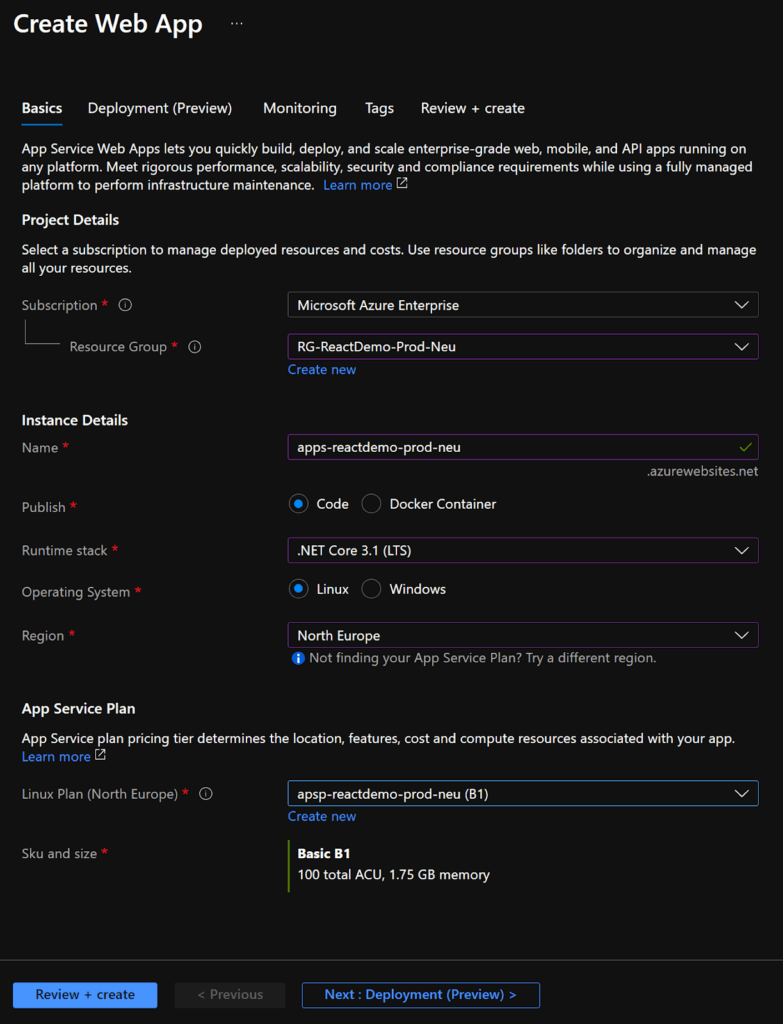
Go to https://portal.azure.com, search for App Services and click the “Create” button and follow the steps:
- Create Resource Group by using the “Create new” action
- Provide a unique name for the resource (for example: apps-reactdemo-prod-neu)
- Pick “Code” as a publish type
- Pick .NET Core 3.1 as runtime stack
- Pick Linux as Operating System
- Pick the region which is closest to you (in my case North Europe
- For the App Service plan use the “Create new” action.
- Click on the Deployment (Preview) button to go to the next step
Under the Deployment (Preview) section, make sure to have it disabled, and go to Monitoring.
Skip the Monitoring and Tags tabs, and go directly to the Review + create tab.
You can see the summary, and if everything is set correctly, just click “Create”.
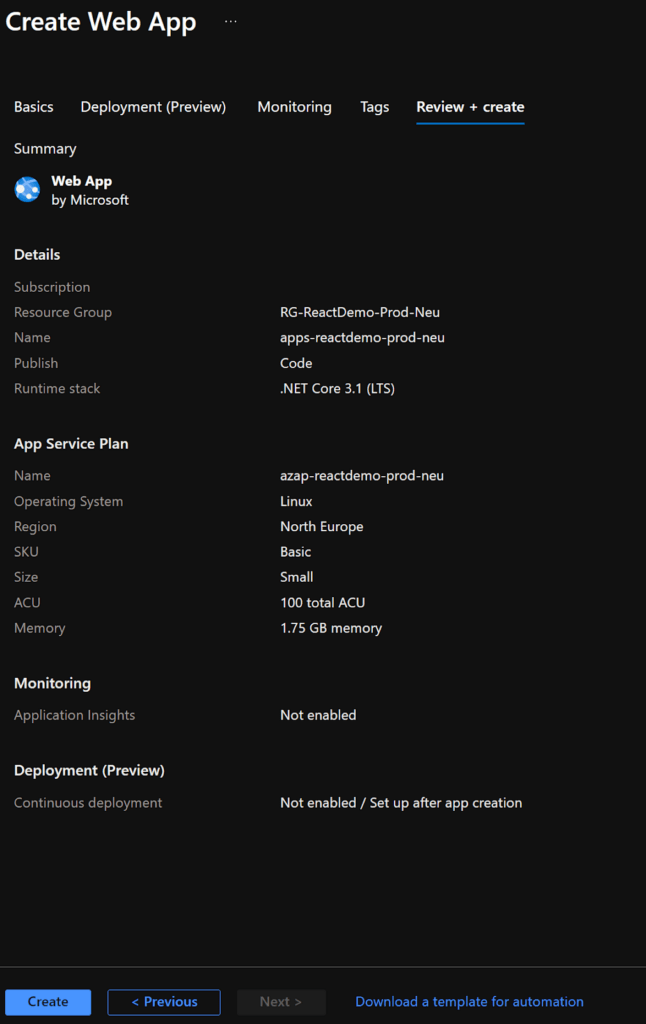
Et voila! Our resource has been created.
Creating Build Pipeline For The Application
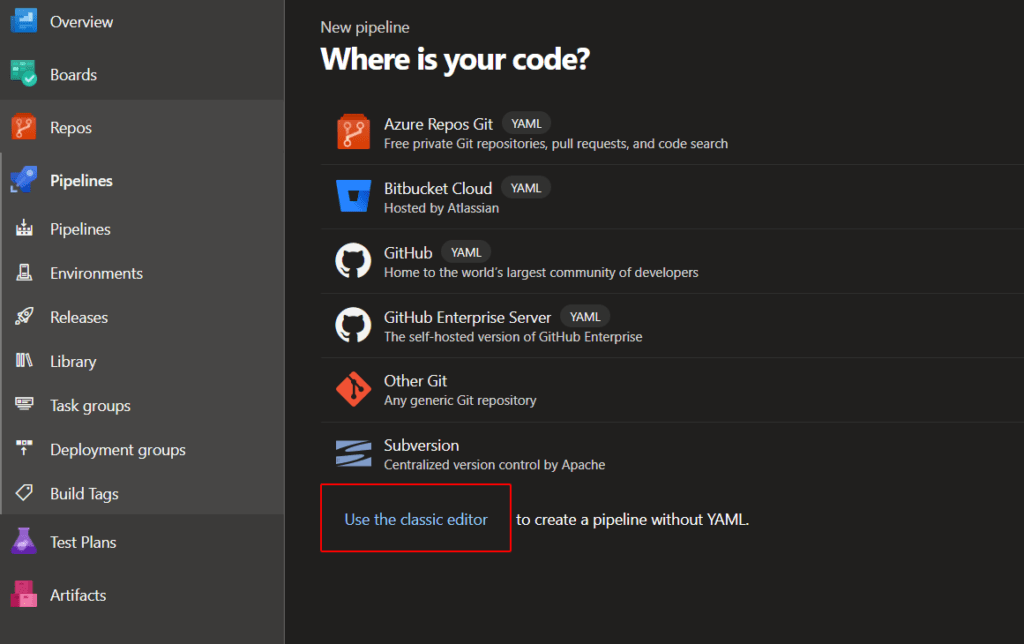
Go to the Azure DevOps, and under Pipelines hit the “New pipeline” button.
To make it more friendly for reading purposes, we are going to use the classic editor instead of YAML.
First, we have to pick a repository. Just pick the one to which you have pushed your code.
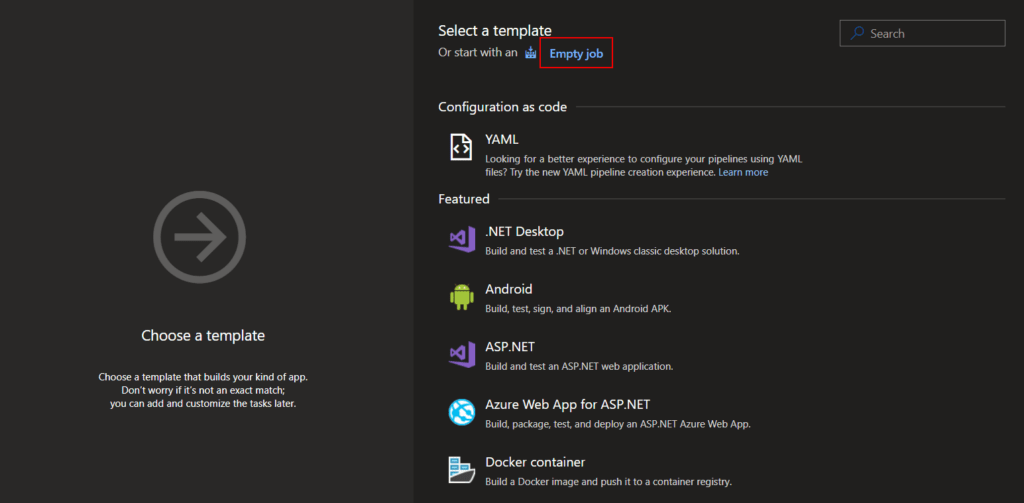
Now we are going to prepare our build pipeline. Don’t choose any template: just pick “Empty job”.
For the default pipelines pick:
- A name which is going to be unique and related to the application (I have called it ‘react-demo CI’)
- Agent pool – Azure Pipelines
- Agent specification – ubuntu-20.04
It’s time to add tasks to our job.
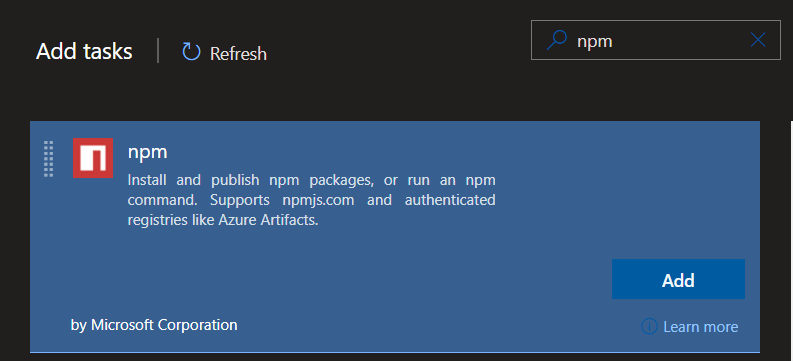
At first, we want to install all node packages for the react application and build it. We have to create two separate tasks for that.
Add a task called ‘npm’.
And configure it accordingly:
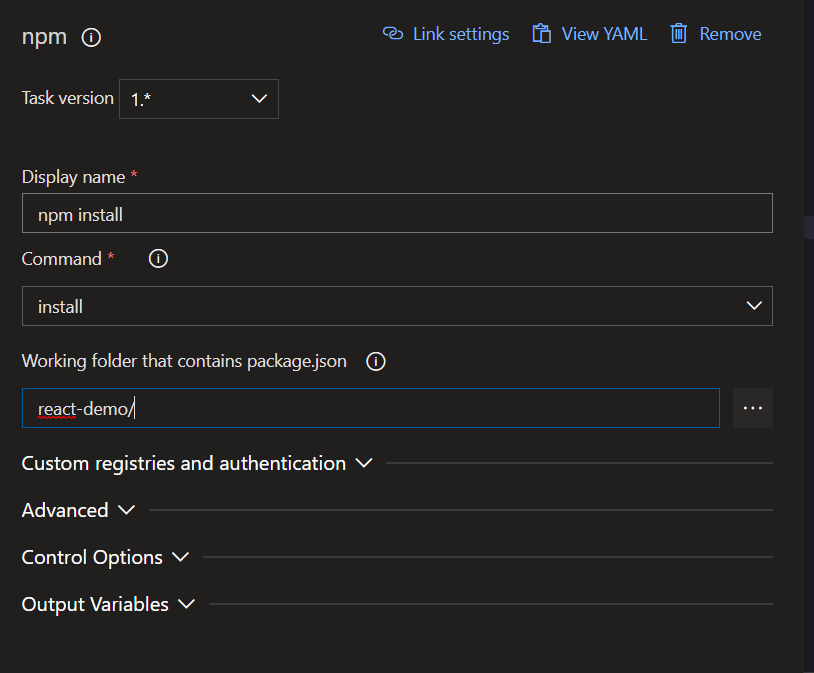
“Working folder” is where we have our React Application.
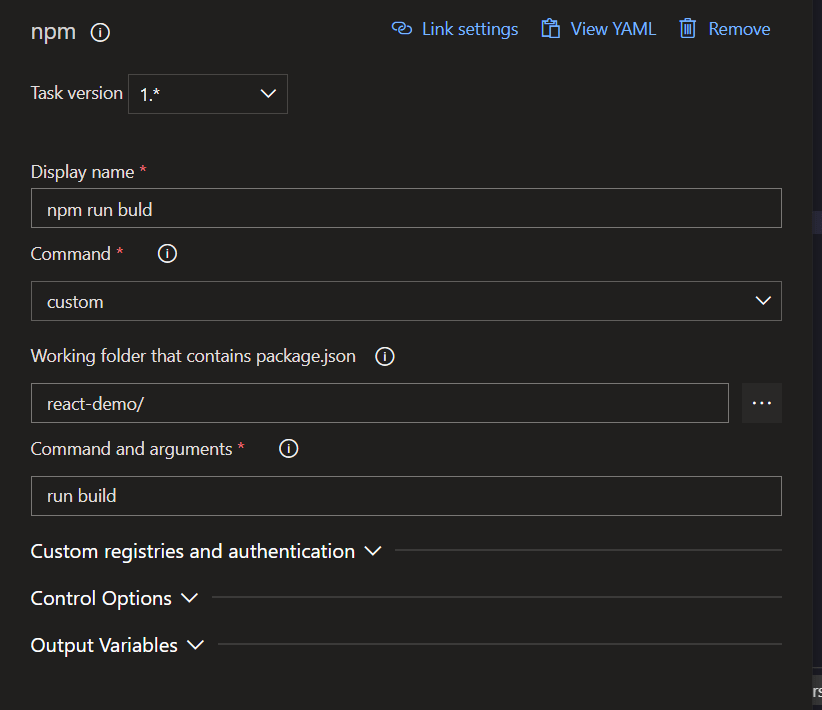
As we have a task for installing node packages, it’s time to add a task for building the application and configuring it accordingly:
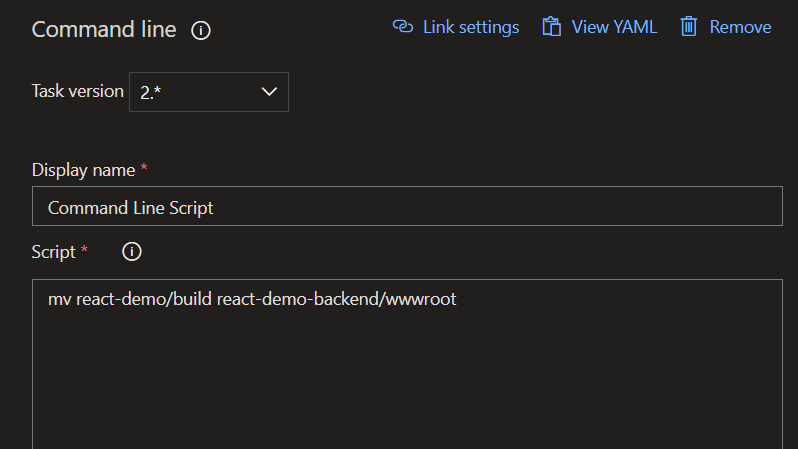
Now that the React application was built properly, it’s time to move the build result to the ASP.NET Core wwwroot directory, so the fallback controller can use it.
We can accomplish it by adding a Command line task:
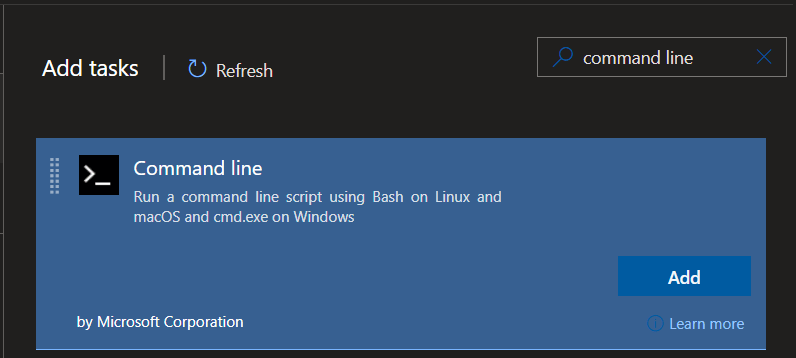
And configuring it accordingly:
Great! We are finished with the React Application part. Now it’s time to build the ASP.NET Core backend.
ASP.NET Core Backend
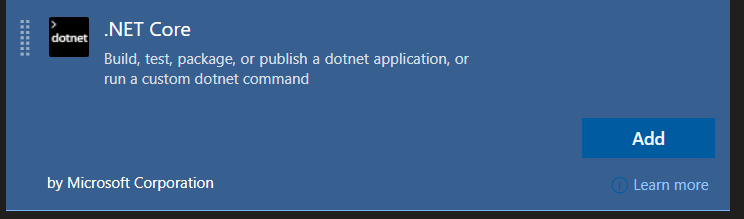
We can accomplish it using dotnet tasks.
We need to:
- Restore
- Build
- Publish
So we need three tasks.
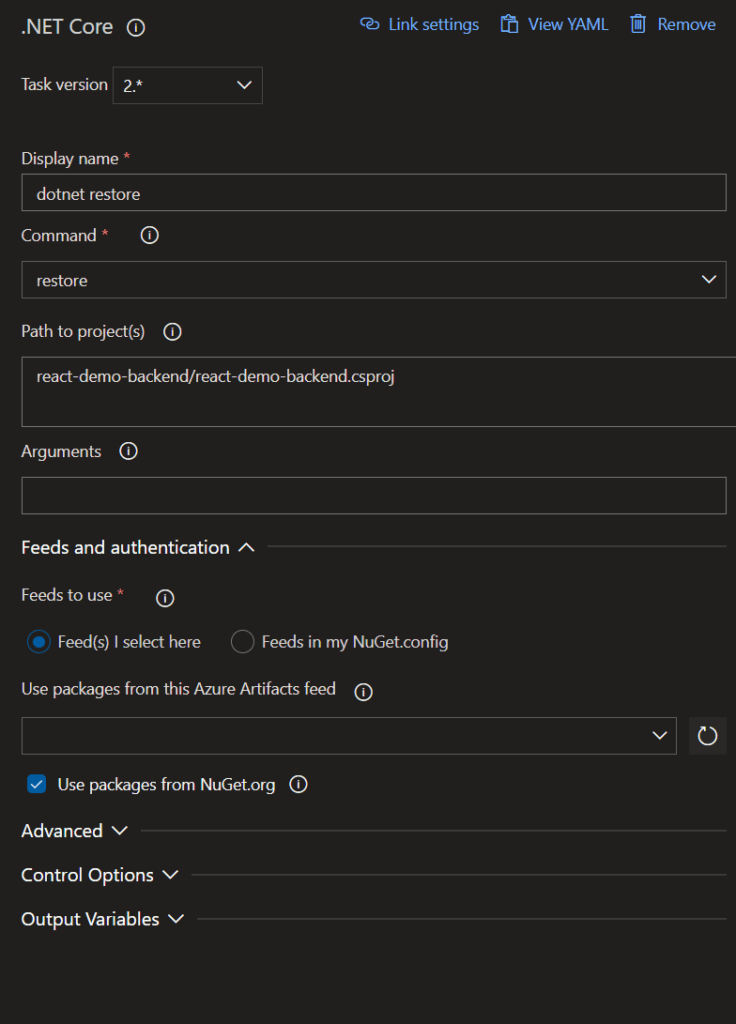
(1/3) Restore Task
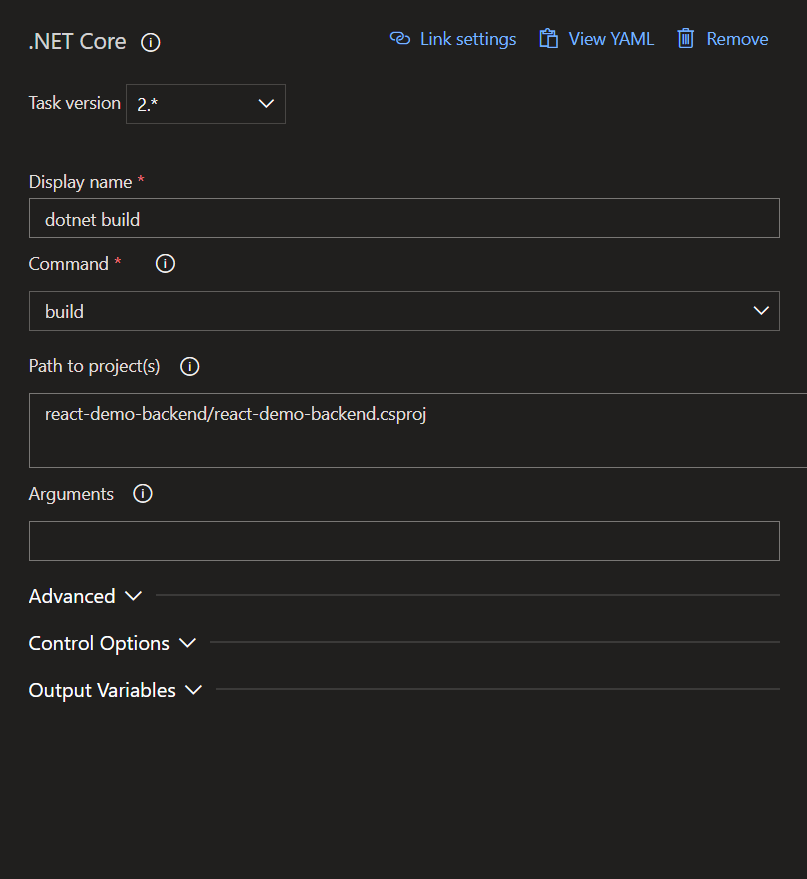
(2/3) Build Task
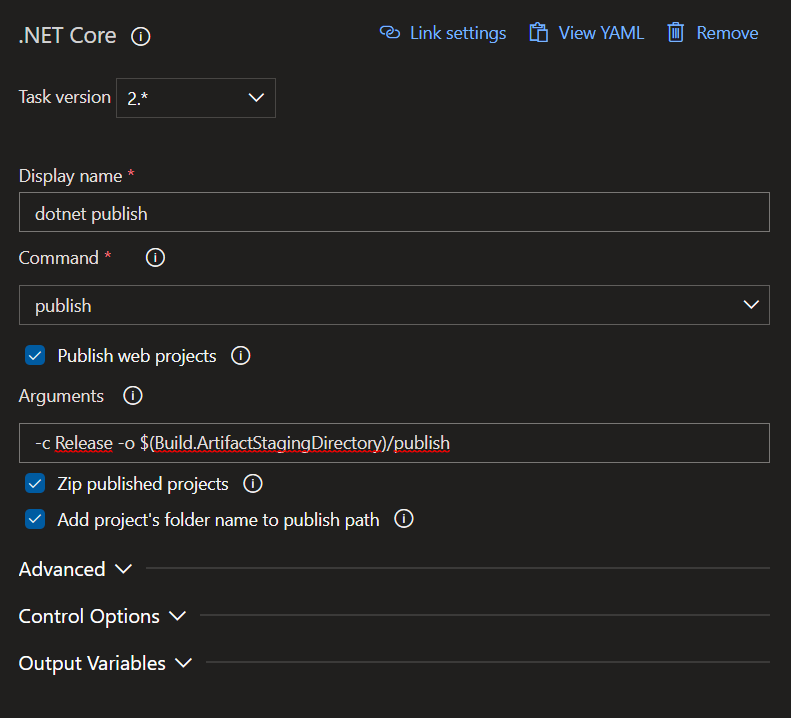
(3/3) Publish Task
To finish the pipeline, we need to publish its result to the artifact.
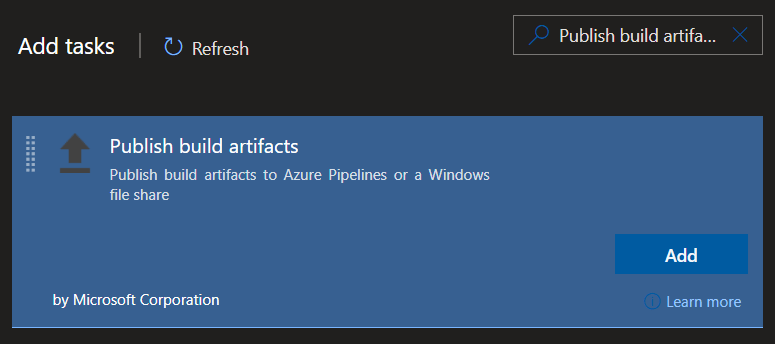
We can accomplish this adding the ‘Publish build artifacts’ task.
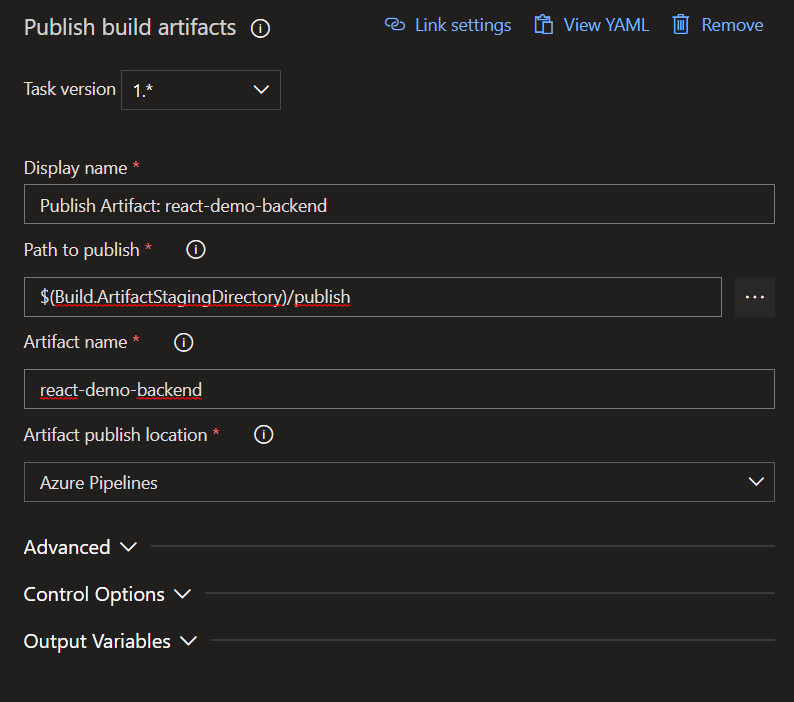
And configuring it properly:
That’s all for the build pipeline configuration.
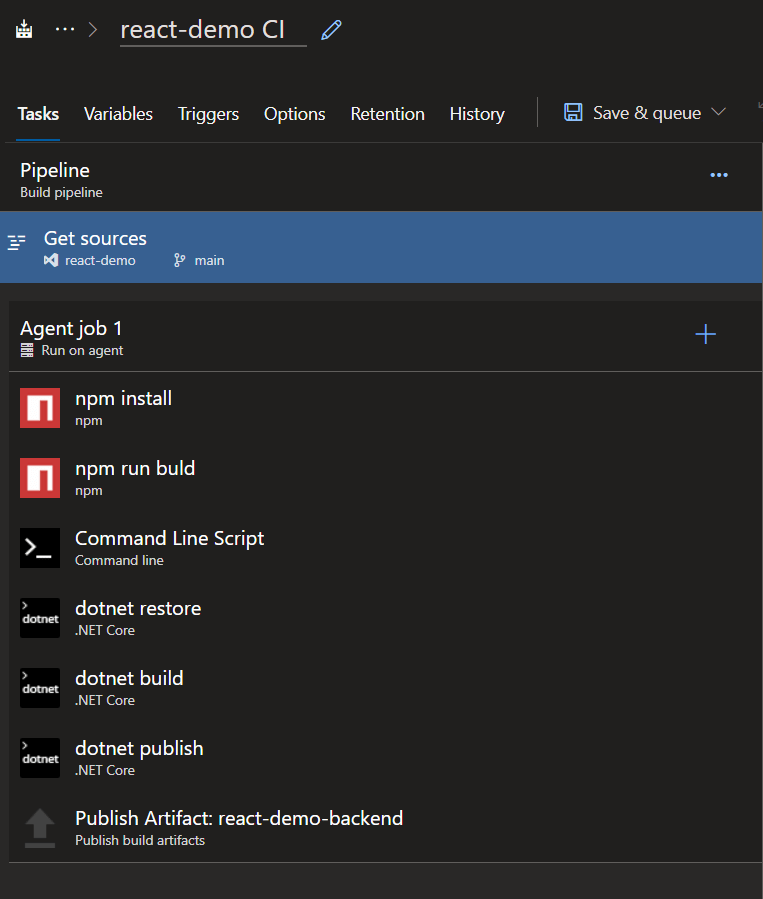
Pipeline Tasks Review
Below you can see the pipeline tasks. Make sure that they are in the same order.
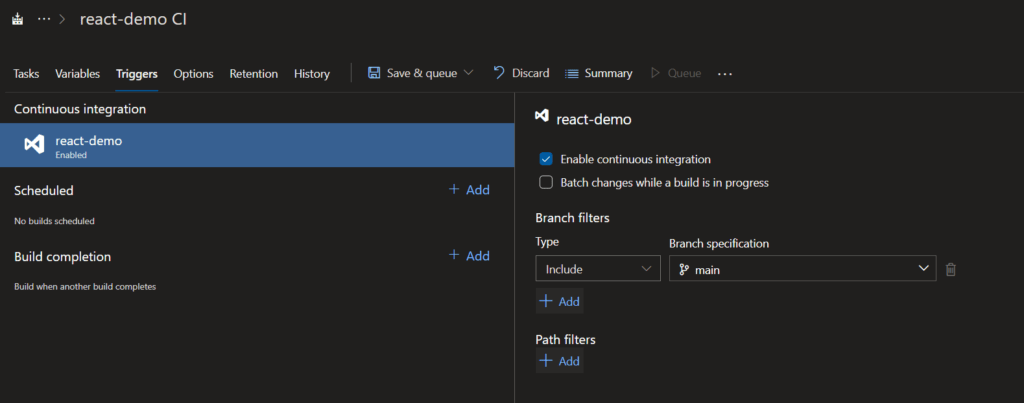
Continuous Integration
Additionally, we can add the Continuous integration feature.
Go to the ‘Triggers’ tab.

Check the “Enable continuous integration” checkbox.
Under branch filters, you can configure to which branch the pipeline should be enabled after push. By default, it is the main branch.
That’s all! We can save the pipeline and queue it automatically – so we can automatically get a build artifact for future use (click on a ‘Save & queue’ button).
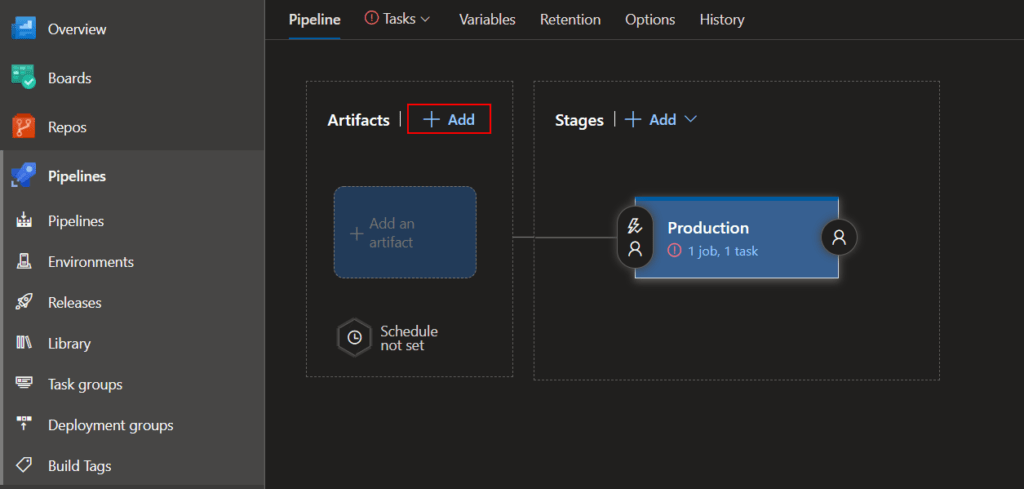
Creating Release Pipeline For The Application
Under release pipelines click on the “New” button and pick “New release pipeline”.
Pick ‘Azure App service deployment’, name the stage ‘Production’, and close the sidebar.
Now, under the Artifacts section click on the “Add” button.
On the sidebar which has opened on the right side, under Source, pick react-demo CI.
The Azure DevOps will automatically link the artifact with its latest version. Click on the “Add” button.
Continuous Deployment Trigger
We are going to add a Continuous Deployment trigger. Click on the ‘lighting’ icon to do that – a sidebar on the right should open.
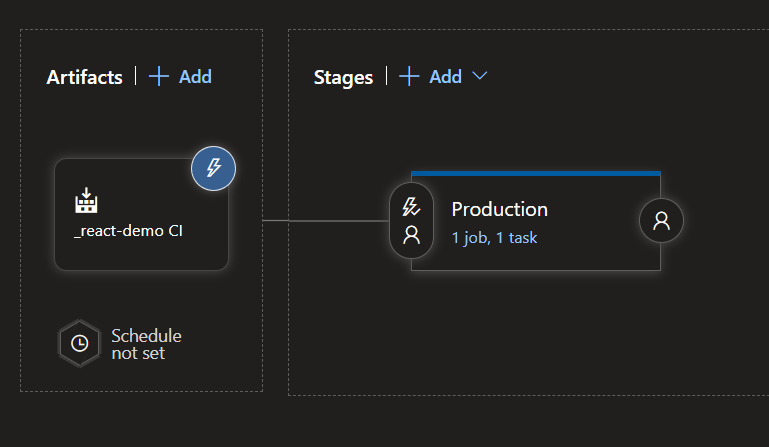
In order to enable CD, just click on the switch control.
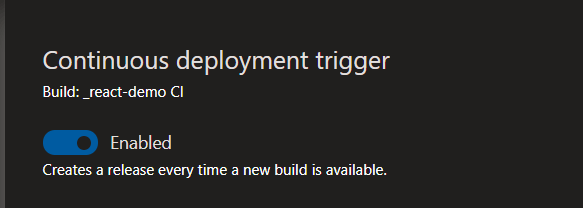
That’s all for CD, just close the sidebar.
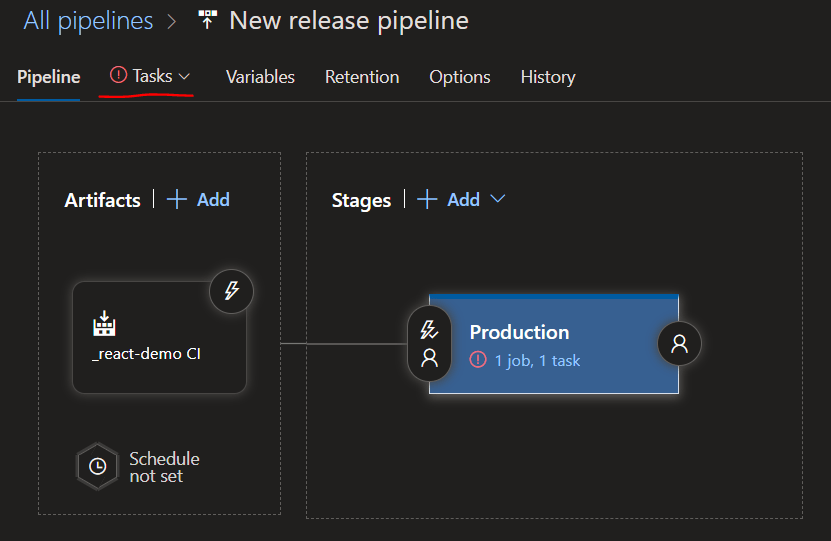
Production Stage
Now on the top, click on the ‘Tasks’ tab to set up the ‘Production’ stage.
Under stage settings:
- Pick your subscription
- Pick App type ‘Web App on Linux’
- Under app service name, select the application which was created previously in the Azure portal (in this article it’s: apps-reactdemo-prod-neu).
Under the ‘Run on agent’ task, select ubuntu-20.04 from ‘Agent specification’.
Under Deploy Azure App Service task in Package or folder field, click on the three dots to pick a package location to be deployed.
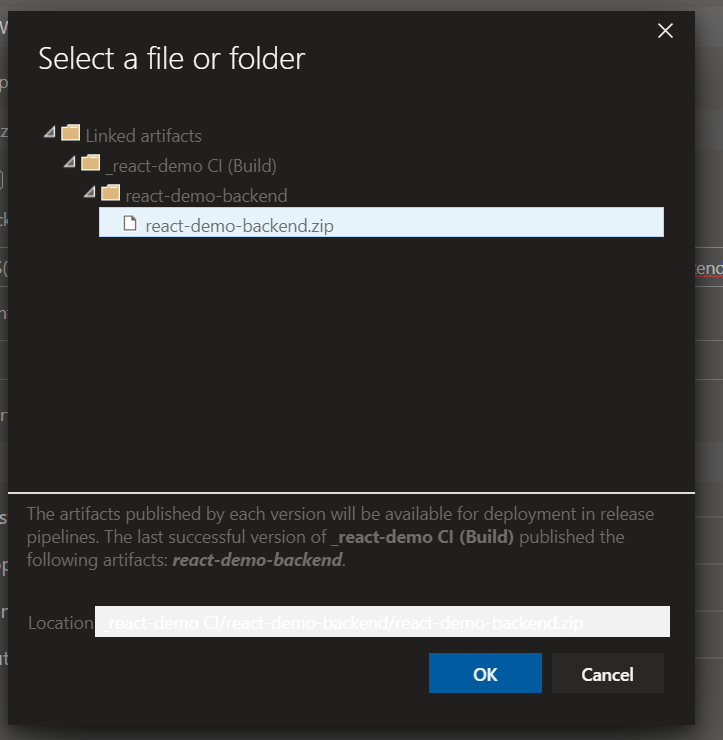
Pick the .zip file located under our linked artifact.
Saving and Deploying React to Azure
The pipeline is ready, it’s time to save it and run it – click on the “Save” button.
Under releases, go to the newly created release pipeline and click on the “Create release” button. Then on the right sidebar, click “Create”.
Then automatically, the service is going to be deployed to Azure.
After release, we can go to apps-reactdemo-prod-neu.azurewebsites.net and see our application running on localhost!
Deploy React to Azure Summary

We have deployed the ASP.NET Core application using Azure DevOps pipelines to Azure. The React application is part of the ASP.NET Core app and is served using a combination of Fallback controller and static files.
The “part” word has not been used by accident. You can do many more with this approach: for example, the host application (backend) can be a WebApi – then the front-end application can use it to get processed data. This helps reduce the cost of Azure resources.
Not only is it great to deploy and maintain the application, but it’s super easy to develop such an application.
Bonus: Skip Creating Build Pipeline
If you want to skip the process of creating the build pipeline, you can use the below yml template. This will save you time to deploy React to Azure.
react-demo CI.yml
jobs:
- job: Job_1
  displayName: Agent job 1
  pool:
    vmImage: ubuntu-20.04
  steps:
  - checkout: self
  - task: Npm@1
    displayName: npm install
    inputs:
      workingDir: react-demo/
      verbose: false
  - task: Npm@1
    displayName: npm run build
    inputs:
      command: custom
      workingDir: react-demo/
      verbose: false
      customCommand: run build
  - task: CmdLine@2
    displayName: Command Line Script
    inputs:
      script: mv react-demo/build react-demo-backend/wwwroot
  - task: DotNetCoreCLI@2
    displayName: dotnet restore
    inputs:
      command: restore
      projects: react-demo-backend/react-demo-backend.csproj
  - task: DotNetCoreCLI@2
    displayName: dotnet build
    inputs:
      projects: react-demo-backend/react-demo-backend.csproj
  - task: DotNetCoreCLI@2
    displayName: dotnet publish
    inputs:
      command: publish
      projects: react-demo-backend/react-demo-backend.csproj
      arguments: -c Release -o $(Build.ArtifactStagingDirectory)/publish
  - task: PublishBuildArtifacts@1
    displayName: 'Publish Artifact: react-demo-backend'
    inputs:
      PathtoPublish: $(Build.ArtifactStagingDirectory)/publish
      ArtifactName: react-demo-backend
...